9 minutes
Marking work hours as paid
To see your team’s expenses and pay rates, please refer to the Financials section of your organization. That page allows you to mark time as paid and/or export payment data in order to process the payment manually.
There may be times when you want to mark work hours as paid in Hubstaff without using an automated payroll setup. This feature is especially useful for teams that manage payments manually or use external payroll systems, but still want to keep accurate records within Hubstaff. Unlike automatic payroll, marking hours as paid doesn’t trigger any actual payment. It simply flags the hours as paid in your Hubstaff records, helping you track what’s already been settled. You can still issue payments separately using one of our integrated payment gateways like Wise, PayPal, or Bitwage.
This guide is intended for organizations that are not using Hubstaff’s payroll feature but want a way to manage and acknowledge paid hours internally. Some common use cases include reconciling manual payments, keeping internal records in sync, or marking hours as paid for team members to accrue time off hours.
Please click on a topic below to get started:
Manually marking hours paid
Step 1
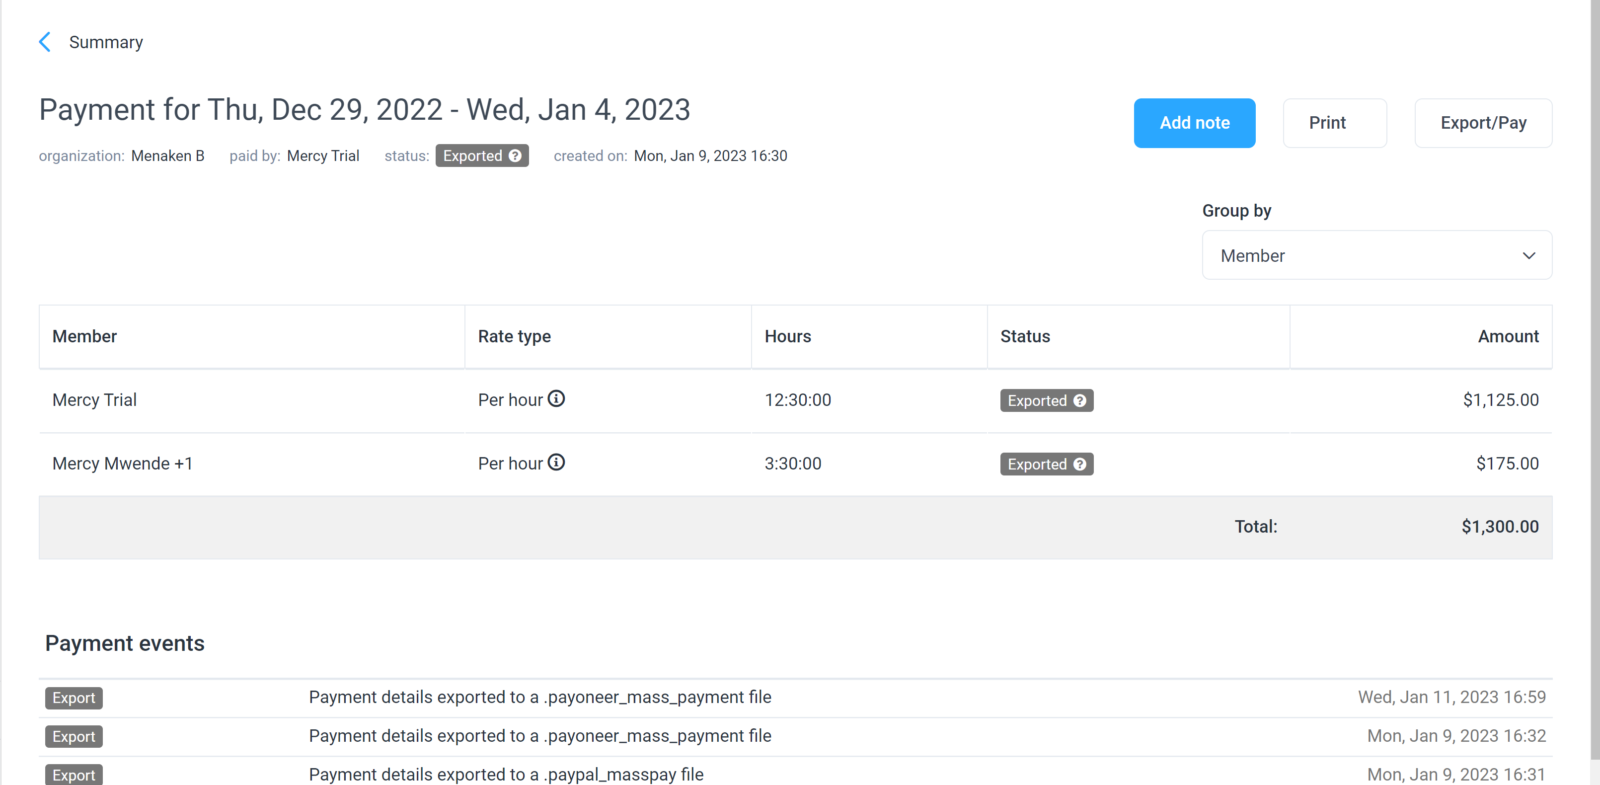
If you need to mark the past activity as paid, all you need to do is go to the Financials > Create Payments page, then set the necessary filters and overview type to review the payment. Once you’re done reviewing the payment, go ahead and click on the Create Payment button.

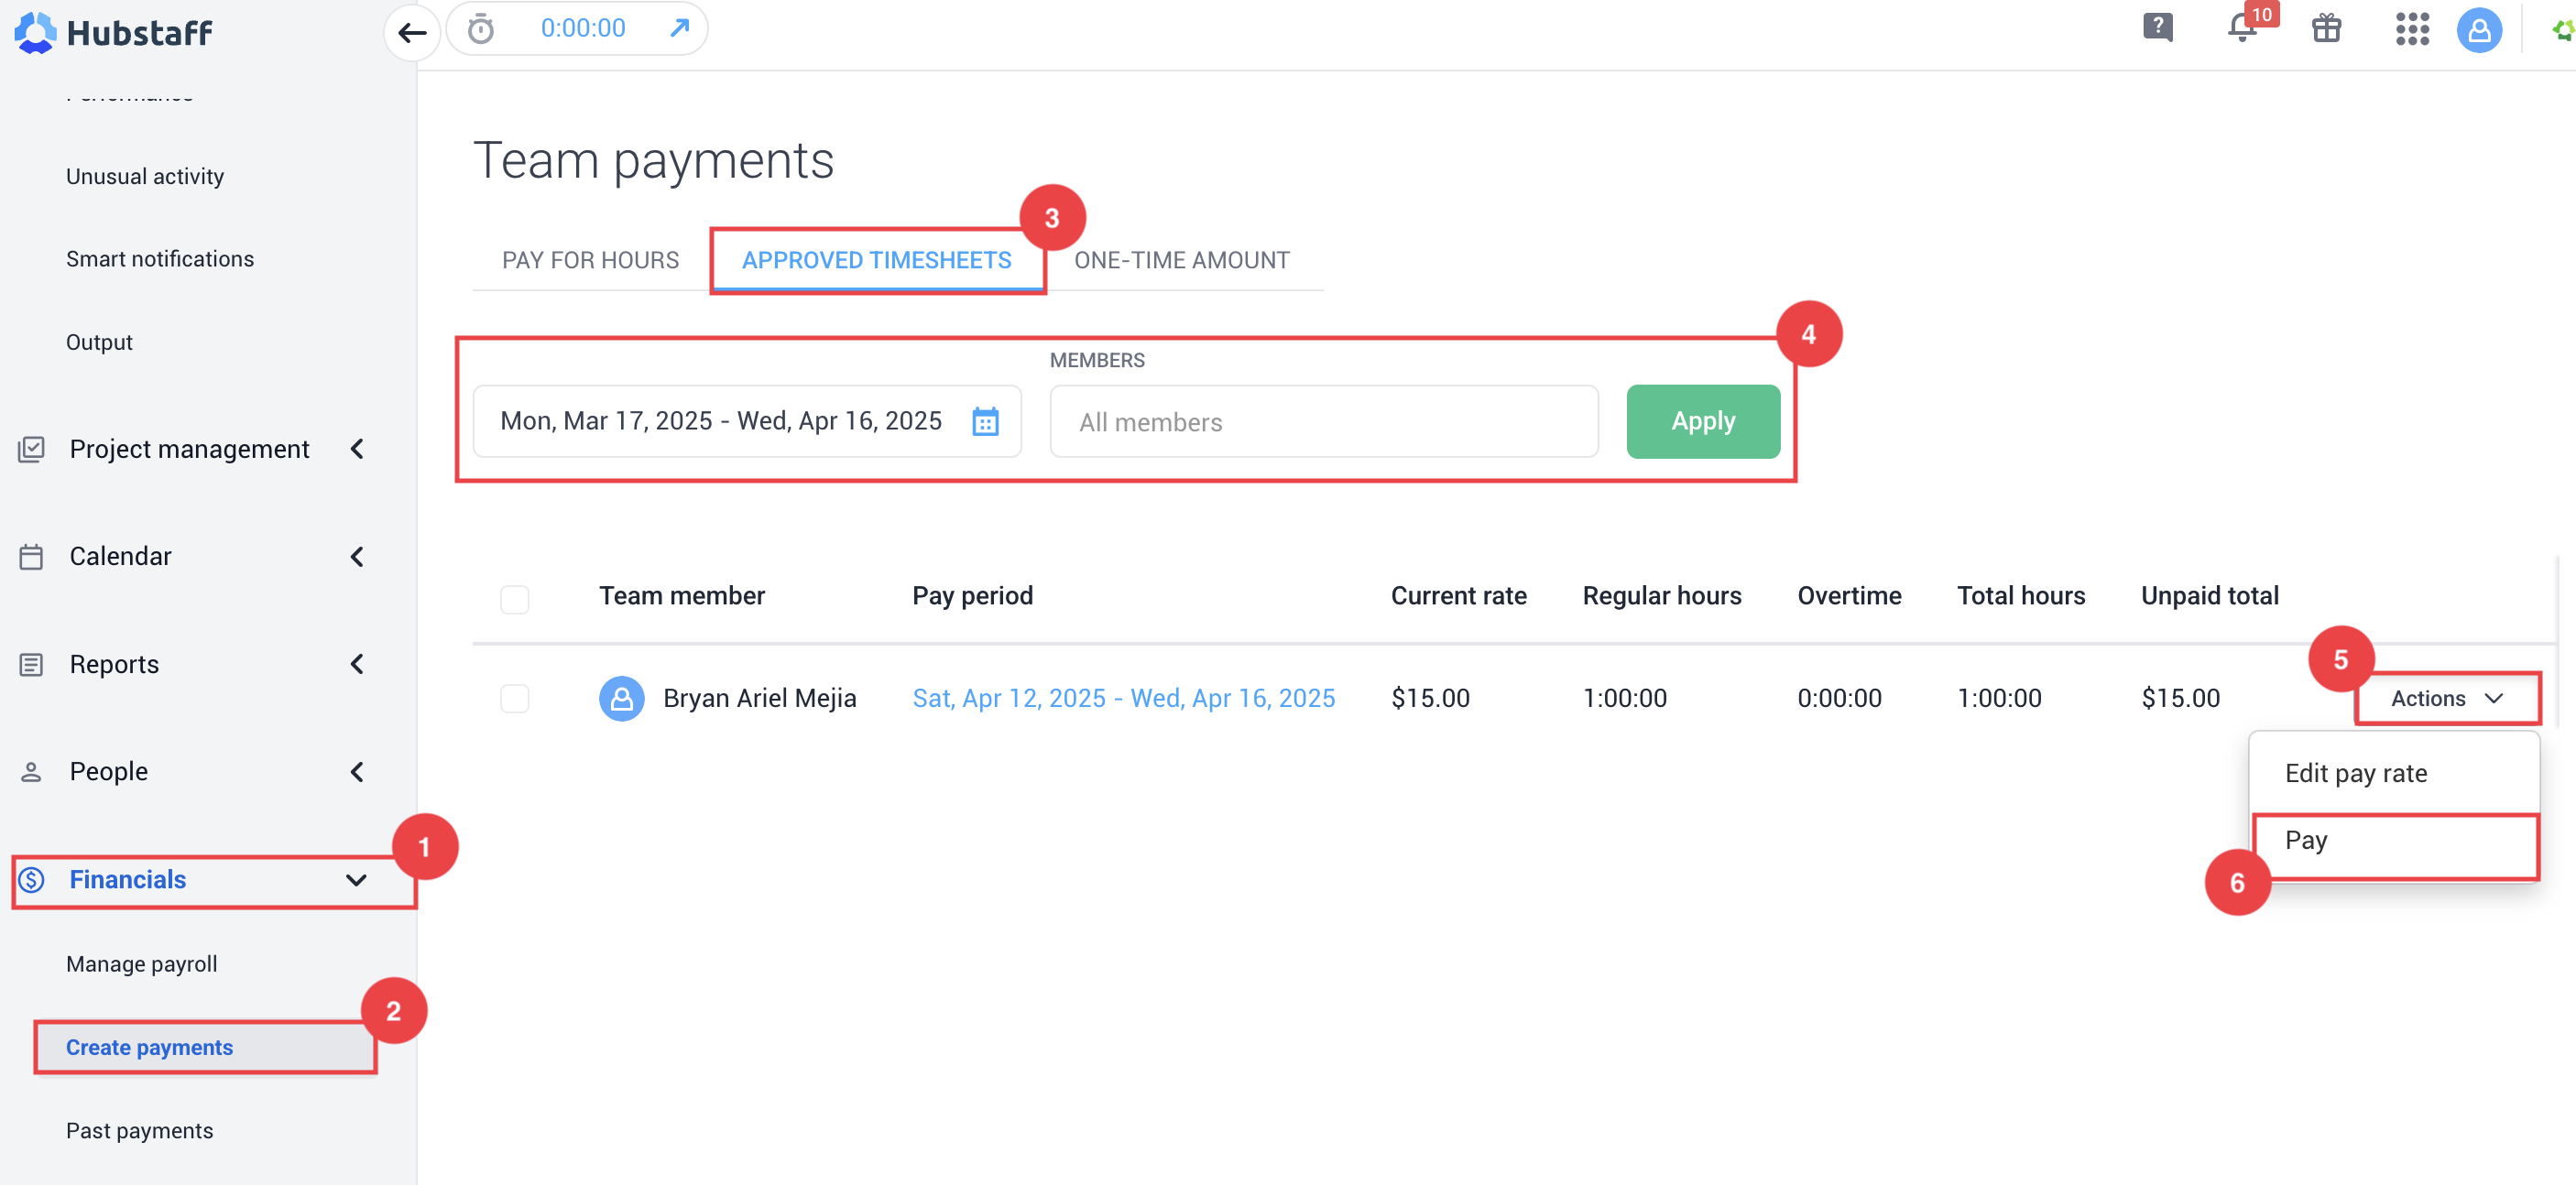
If timesheet approvals have been enabled in the organization, then click on the Financials > Create Payments page, then choose the Approved Timesheets tab. You can choose to filter and review the payments, then against the user, click Actions >Pay.
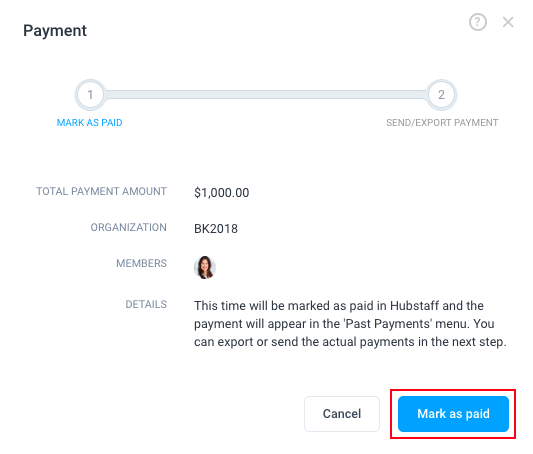
Step 2
Next, click the Mark as paid button.
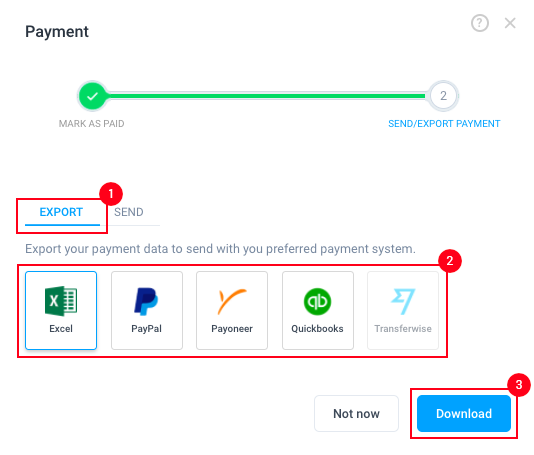
Step 3
Then you should see a modal with different payment export options; You can select anyone for exporting the payment record and click Download.
Past payments will be available on the Payments > Past Payments page. Here, the status of a manual payment will be Pending, and as you hover over it, you will see that it was a manual payment. Additionally, exported payments will be marked as Exported.
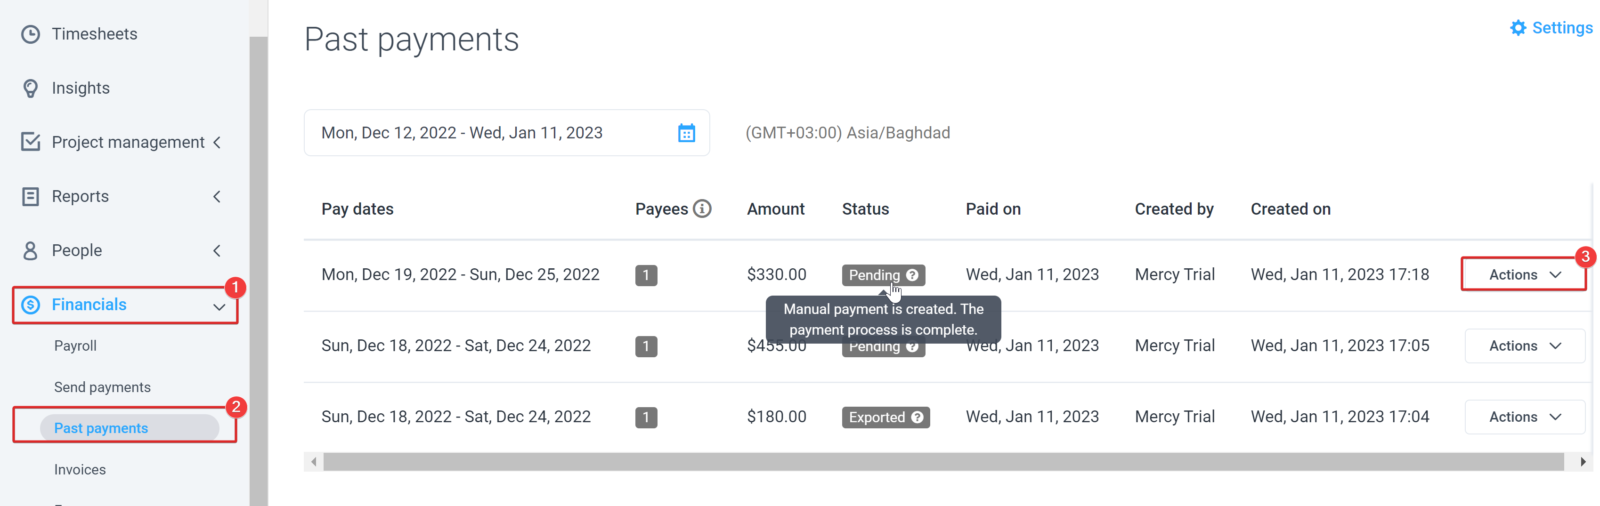
To view a detailed report on the payment, click on Action ⇾View
Automatically marking hours paid
If you want to mark hours as paid automatically based on a specific pay period, follow the steps below:
Step 1
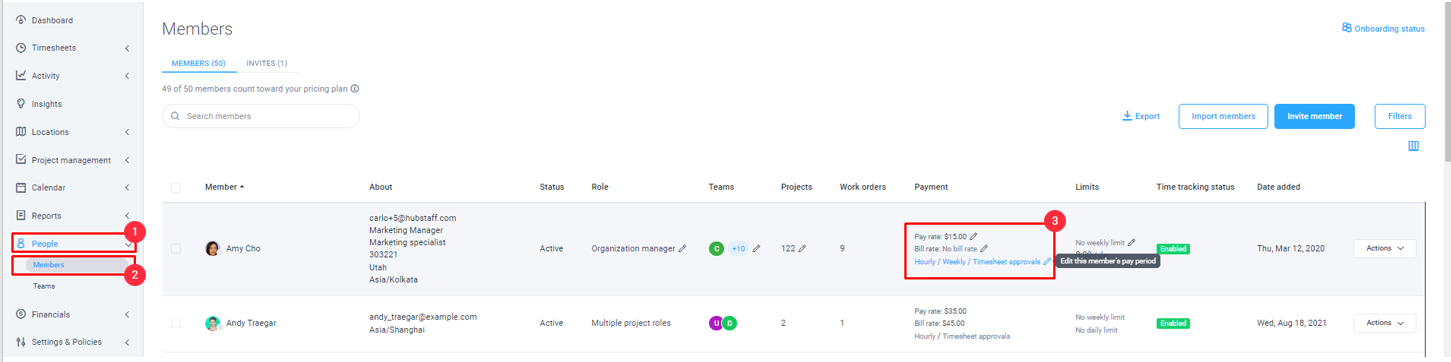
Click on the People ⇾ Members page and then the Pencil icon under the Payment column.
Step 2
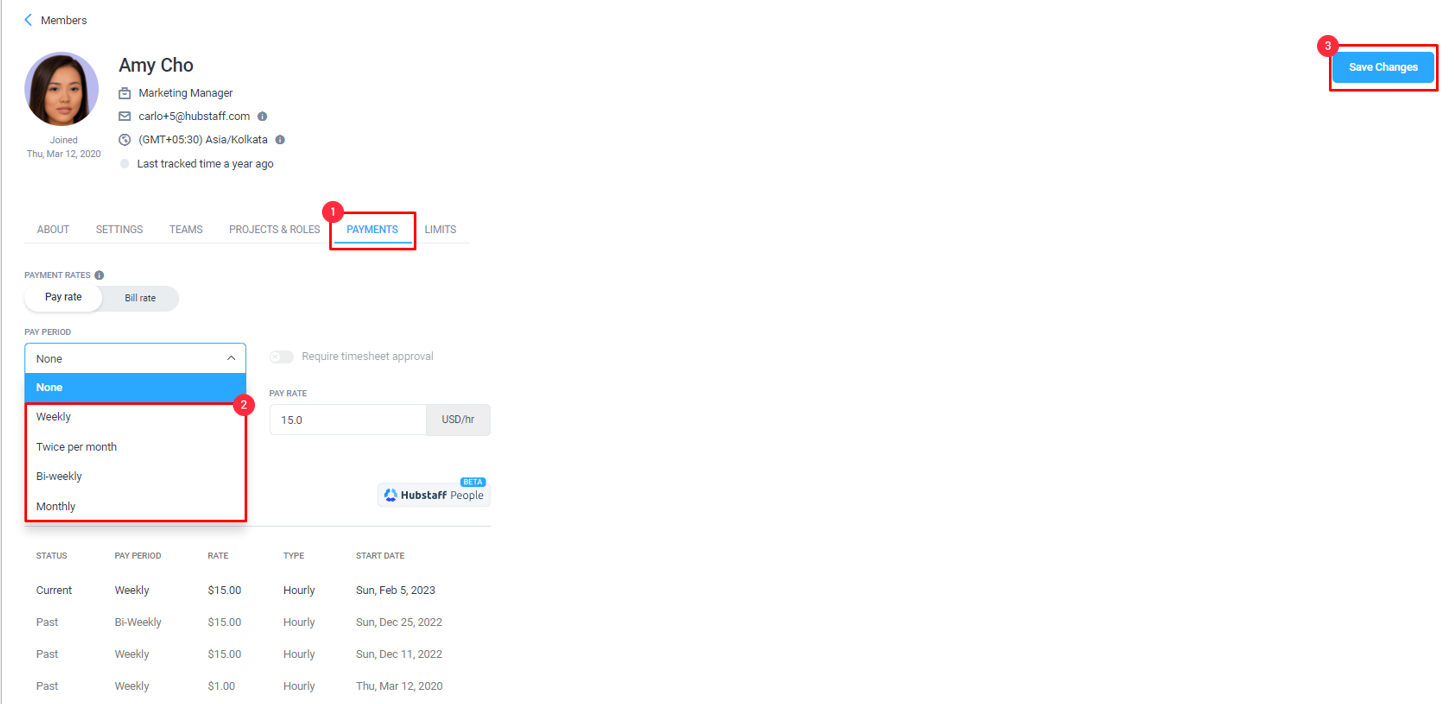
In the payments tab, edit the pay period to either Weekly, Twice per month, Bi-weekly, or Monthly, and click Save Changes.
Prevent hours from being marked as paid automatically
Step 1
Navigate to the People > Members page and click on the Pencil icon under the Payment column.
Step 2
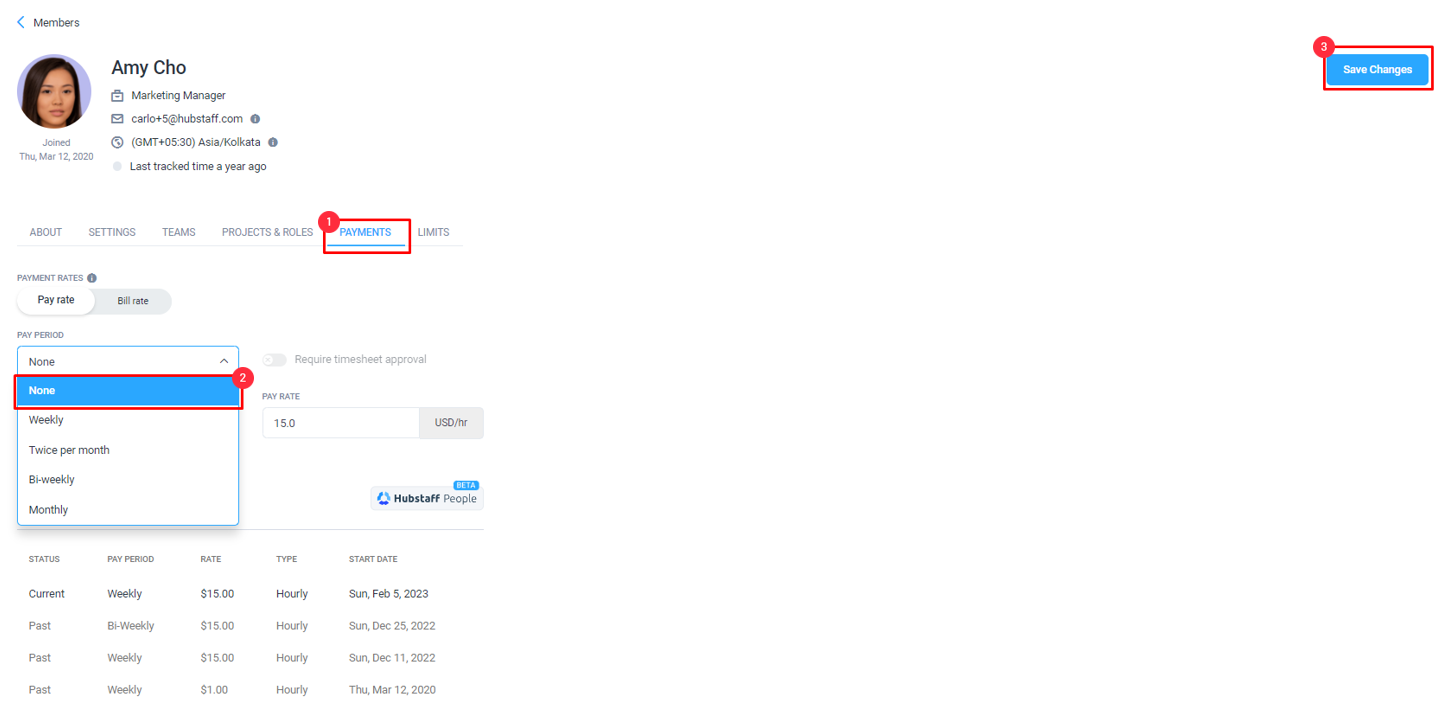
On the payments tab, change the pay period to None and click Save Changes.
After adding this setting, payments will no longer be marked as paid automatically on the Payments > Past page.
The hours tracked by the users will not reflect on the Payment > Send page when the timesheet approval setting is enabled on their account.