18 minutes
Setting up Job sites in Hubstaff
Hubstaff supports Job Sites (also known as geofencing) which designates a specific area where your team is allowed to track time. The app can automatically start recording the time when a user enters the job site or stop the timer when they leave the job site.
Whenever a user is tracking time within a job site, the system provides a report of when and for how much time the user spent at that job site, which you can generate and review with our Reports feature.
This guide will show you how you can access the Job Sites feature and use it for your team.
Add job sites
Manually adding job sites
Step 1
Navigate to Locations > Job sites menu on the sidebar.

Step 2
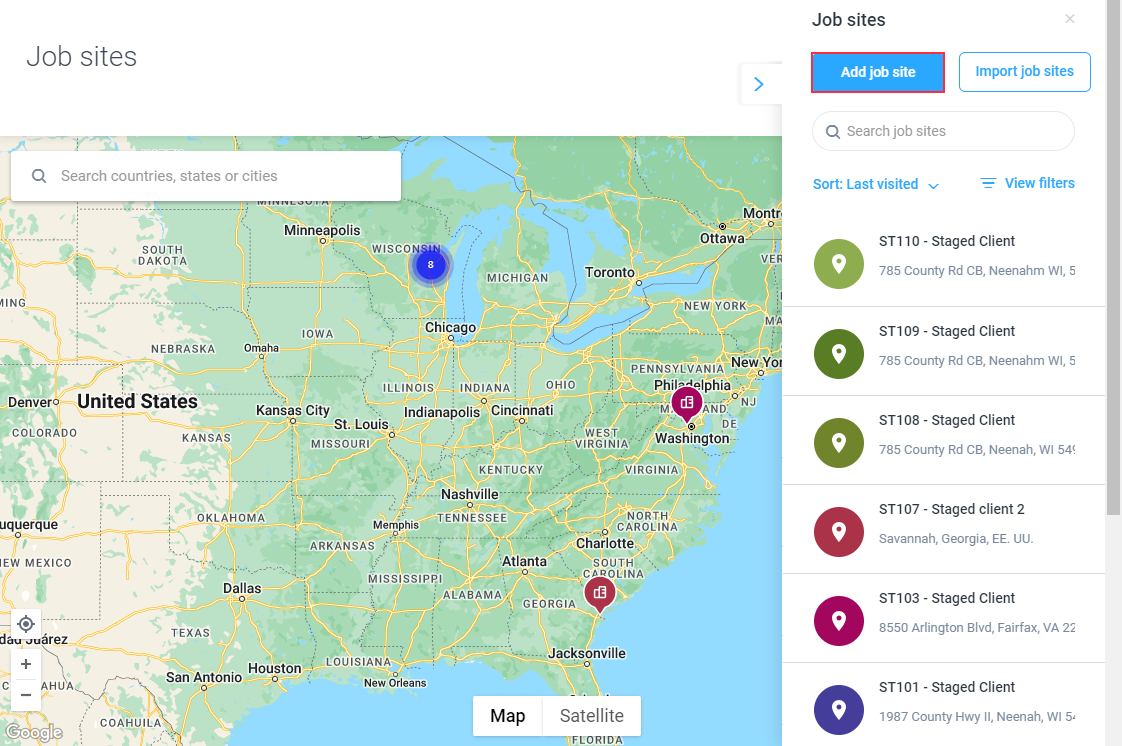
Click on the Add a Job Site button. If you have existing job sites and want to edit them, hover over the job site name then click the pencil icon.
Step 3
Enter the site name, and address, then select the radius of the job site, then click Next.

Blue – less than 10 job sites in a cluster.
Red – equal to or more than 10 job sites in a cluster.

Step 4
Select team members or Teams allowed to track time on this job site, then choose Automatic timer actions. Hit Save to confirm settings, and your team is set to track time to job sites.

Automatic timer actions
- On Arrival
- Start Timer – the timer starts automatically when a user is within range of the job site.
- Send Reminder – sends a notification to the user via the mobile app that they have entered the range of the job site.
- Don’t start timer – no automatic actions when arriving at a job site.
- Track time to project – select which project the app automatically tracks time to when recording time to a job site.
- On Departure
- Stop timer – the timer stops automatically when a user is within range of the job site.
- Send reminder – sends a notification to the user via the mobile app that they have left the range of the job site.
- Don’t stop timer – no automatic actions when departing a job site.
Import job sites
You can now upload multiple job sites at once using CSV, XLS, or XLSX files.
Step 1
First, download our template, then create a CSV, XLS, or XLS file by following the format based on the template here:
Below is the format of the CSV file:
| Name | Address | List of emails (comma separated) | Geofence radius (50m minimum) |
|---|---|---|---|
| Job site 1 – CHANGE OR REMOVE | 123 W. Main St. Anytown, AB, Country, 12345 – UPDATE ADDRESS | member1@example.com,member2@example.com,member3@example.com | 50 |
| Job site 2 – CHANGE OR REMOVE | 456 E. 2nd Ave. Different Town, AB, Country, 12345 – UPDATE ADDRESS | member4@example.com,member5@example.com,member6@example.com | 100 |
| Job site 3 – CHANGE OR REMOVE | 789 Any Way, AB, Country, 12345 – UPDATE ADDRESS | member4@example.com | 200 |
Step 2
Once the file is ready, navigate to Locations > Job Sites.

Step 3
Next, click on the Import job sites button.

Step 4
A dialog box will appear where you can upload the CSV, XLS, or XLSX file you created. Click on Browse Files to upload the document.

Step 5
Once you’ve selected the file, click on the Import button.

Step 6
A popup will appear notifying you that the job sites are being processed.

A subsequent email will appear once the job sites have been processed successfully.

Editing existing job sites
To edit existing job sites:
Step 1
Navigate to Locations > Job Sites.

Step 2
Click on the pencil icon next to the job site name.

Step 3
Change the details of the job site then click Save.
Deleting existing job sites
To delete an existing job sites:
Step 1
Navigate to Locations > Job Sites.

Step 2
Click on the Trash bin icon next to the job site name.


An alternative is deleting it while on the edit job site page.

Restrict timer to Job Sites
You can also restrict time tracking to Job Sites. When this setting is enabled, users will not be able to start the timer unless they are within the Job Site radius.
Step 1
Navigate to Settings > Schedules > Job sites.

Step 2
You should be on the Job Sites tab and see the Restrict timer to job sites setting.
The Default option will enable/disable the setting for the entire organization. You can also change individual settings which will override the organization’s default setting.

The operating system decides which job site the user enters first in the event of overlap between job sites. We report the first job site detected by the operating system in these instances.
Track Locations must be set to: Tracking Time, During Shifts, or Always, never set to “Off”.