18 minutes
Hubstaff Team Invoices
Here you can discover everything you need to know about using team invoices in Hubstaff. Team invoices enable team members to request payment for their completed work.
This feature is one of the available options for managing team payments within Hubstaff. Our article is organized into two sections: the first provides guidance for team members on submitting and managing their invoices, while the second offers instructions for management on reviewing and processing them.
Creating, editing, and deleting invoices as a worker (team member)
Creating invoices
Step 1
First, navigate to Financials > Invoices.
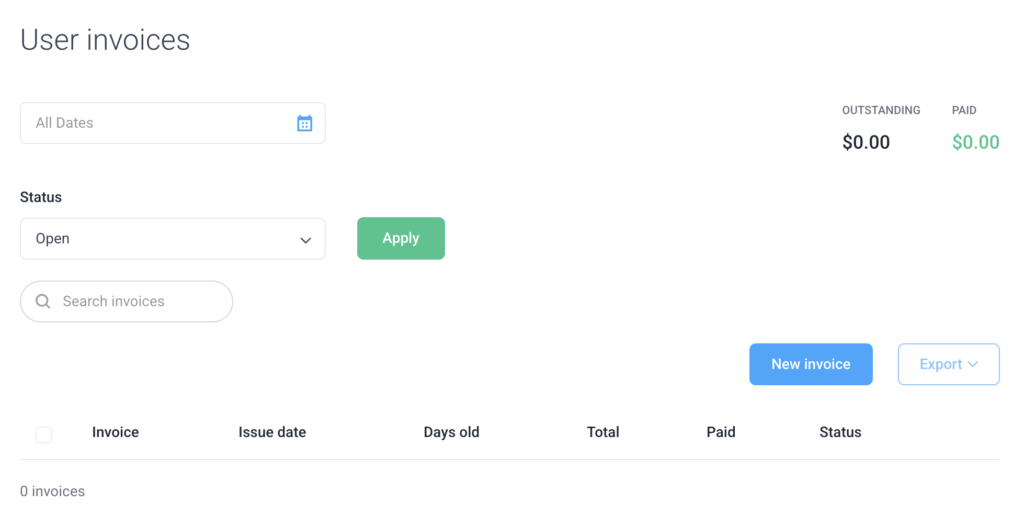
Owners (and ORG managers with the Manage financials permission enabled) will see Client and Team tabs.
Step 2
Click on New Invoice.
Step 3
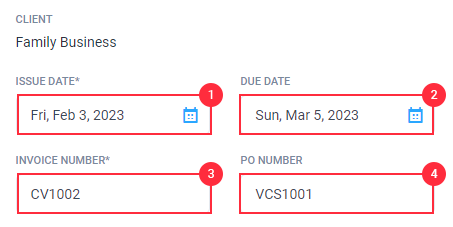
Fill in the issue date, due date, invoice number (automatically generated based on the initials of the user and the next available invoice number), and finally, an optional PO (or purchase order) number.
After filling in the header details, you can then add line items manually or automatically. Head on over to the following sections to continue.
Manually add line items
To manually add line items, first, fill in the following fields.
- Description – add the description of the line item detailing the job performed, for example, “Development.”
- Quantity – this could be the number of hours worked towards the task.
- Unit price – this could be the rate you are paid every hour.
- Add item – adds another line item.

Once you’re done, click Save and send to send a copy of the invoice to your employer. On the other hand, you can click on Save as Draft to keep a copy of the invoice until you’re ready to send it.
Automatically add line items
To add automatic line items based on time tracked in Hubstaff:
Step 1
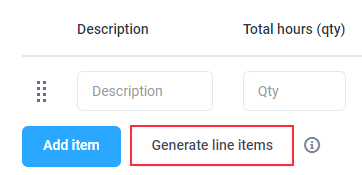
First, on Generate line items.
Step 2
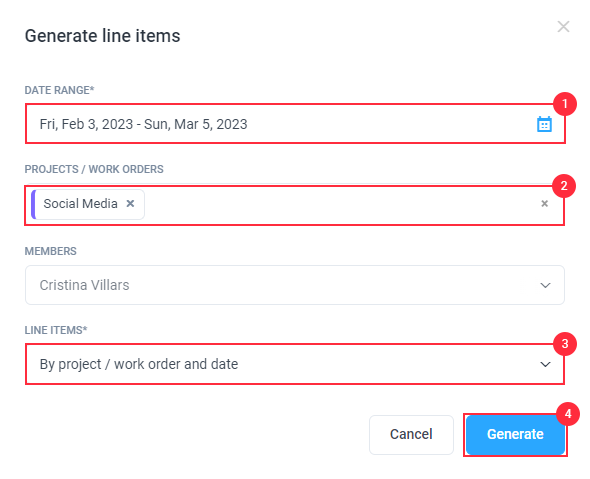
Next, fill in the date range, projects (or work orders), as well as line items, then click Generate.
Step 3
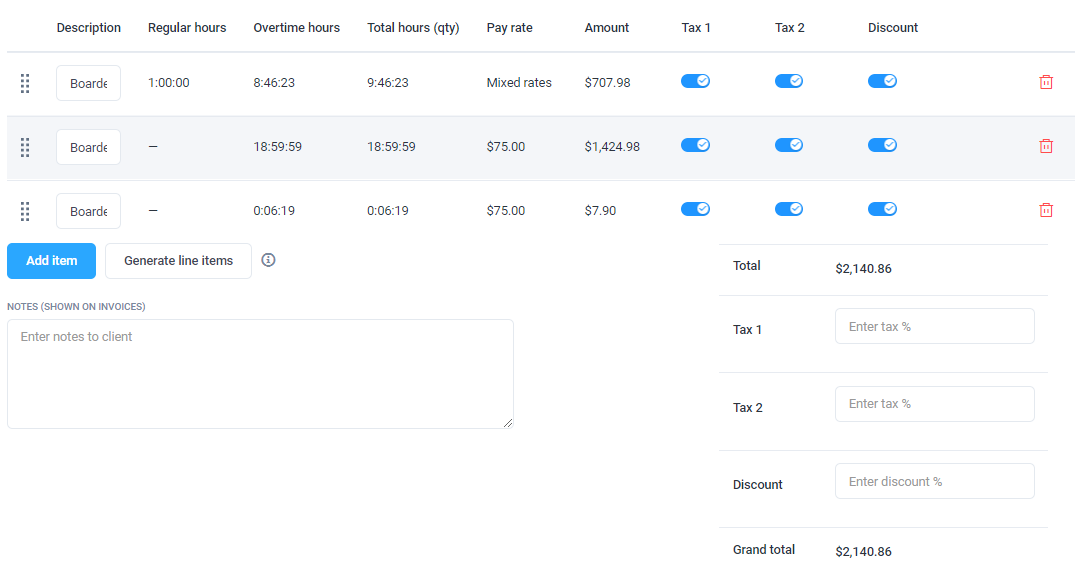
Finally, you’ll see the items automatically filled in based on the time tracked. After that, click on Save and Send to send a copy of the invoice to your employer. On the other hand, you can click Save as draft to keep the invoice without sending, or Cancel.
Editing invoices
If you’d like to make changes to your invoice, please follow the steps here:
Step 1
Firstly, navigate to Financials > Invoices.
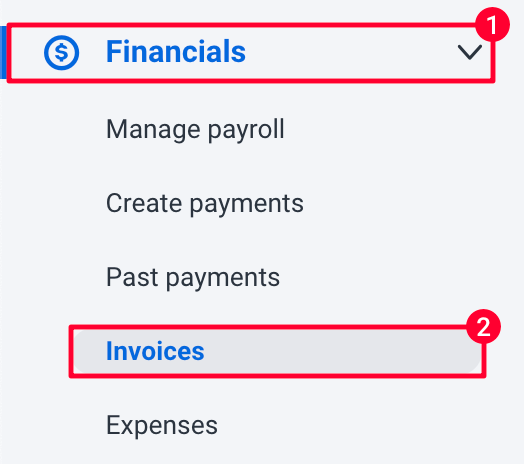
Step 2
Next, click on the Actions button next to the invoice you’d like to edit, then click on Edit invoice.
Step 3
Finally, after making the changes, you can click on Save and Resend, Save, or Cancel.
Deleting invoices
If you’d like to delete your invoice, please follow the steps here:
Step 1
Firstly, navigate to Financials > Invoices.

Step 2
Next, click on the Actions button next to the invoice you’d like to edit, then click on Delete invoice.
Step 3
Finally, click on OK to confirm the deletion.
Managing team invoices as a company
Viewing invoices created by team members
Step 1
Firstly, navigate to Financials > Invoices, then click on the Team tab.

Step 2
Next, click on the invoice number to open it.
Step 3
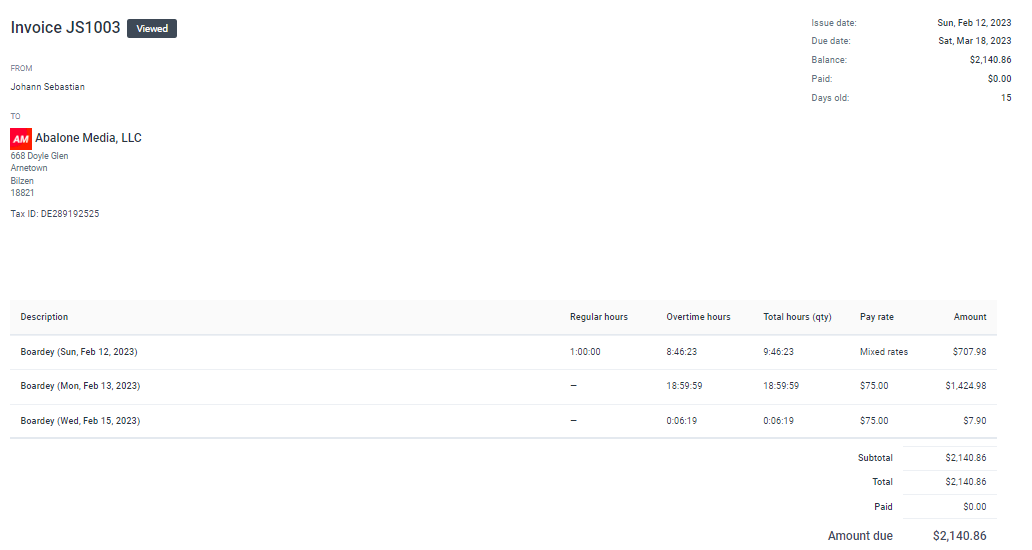
The invoice page will then open up.
Sending payments for team invoices
Step 1
Firstly, navigate to Financials > Invoices, then click on the Team tab.

Step 2
Next, click on the Actions button next to the invoice name, then click Send payment.
Step 3
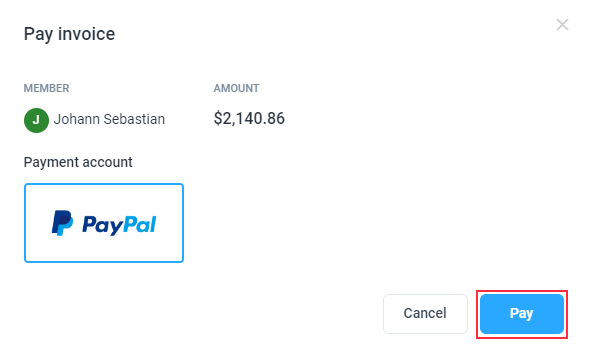
Confirm that the amount is correct, and then click the Pay button.
Step 4
Finally, you’ll receive a message letting you know that the payment has been successfully sent.
Recording payments on team invoices
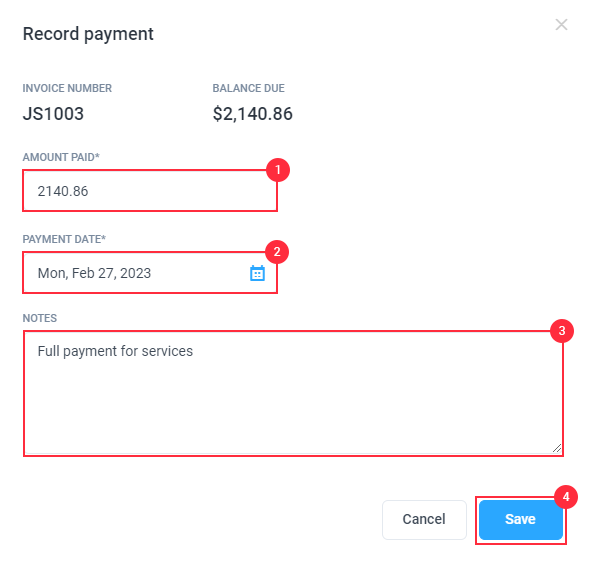
Recording payments is useful when you pay your team outside of Hubstaff, but still want the invoice to be marked as paid. To record a payment:
Step 1
Firstly, navigate to Financials > Invoices, then click on the Team tab.

Step 2
Next to the invoice you’d like to mark paid, click on Actions > Record payment.
Step 3
The record payment dialog will appear. Fill in the details then hit Save.
Exporting team invoices
Step 1
Firstly, navigate to Financials > Invoices, then click on the Team tab.

Step 2
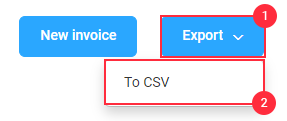
Click the Export button, then choose the CSV option.
Step 3
After opening the CSV file, you’ll see the details of each of your invoices.

