4 minutes
How to edit project memberships and roles
Managing who can access your projects—and what they can do—is essential for staying organized in Hubstaff. In this guide, you’ll learn how to edit project memberships and assign roles so your team has the right access at the right time. Whether you’re adding new members, updating permissions, or reassigning responsibilities, Hubstaff makes it easy to keep project access up to date and secure.
How to edit project memberships and roles from the Projects section
Step 1
Select Project Management > Projects from the main navigation menu, then under the Members column next to the project name, click on the pencil icon to edit memberships.
Step 2
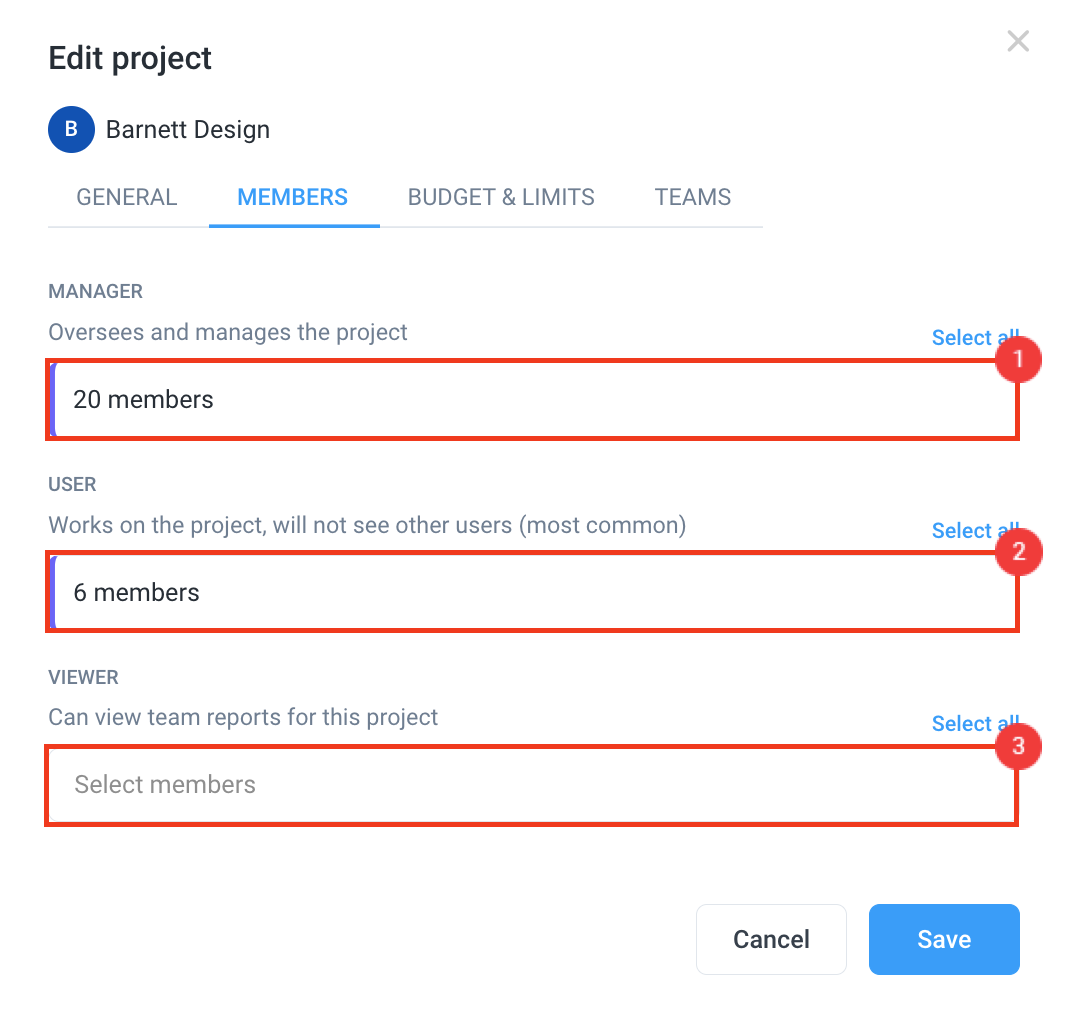
A dialogue will appear, allowing you to assign/re-assign members to the project and also change their roles.
Once the necessary edits are made, click Save to finalize the changes.
How to edit project memberships and roles from the Members section
Step 1
Navigate to Sidebar > People > Members from the main navigation menu. Hover your cursor under the Projects column and click on the pencil icon that appears in the line of a member whose membership you would like to edit.
Step 2
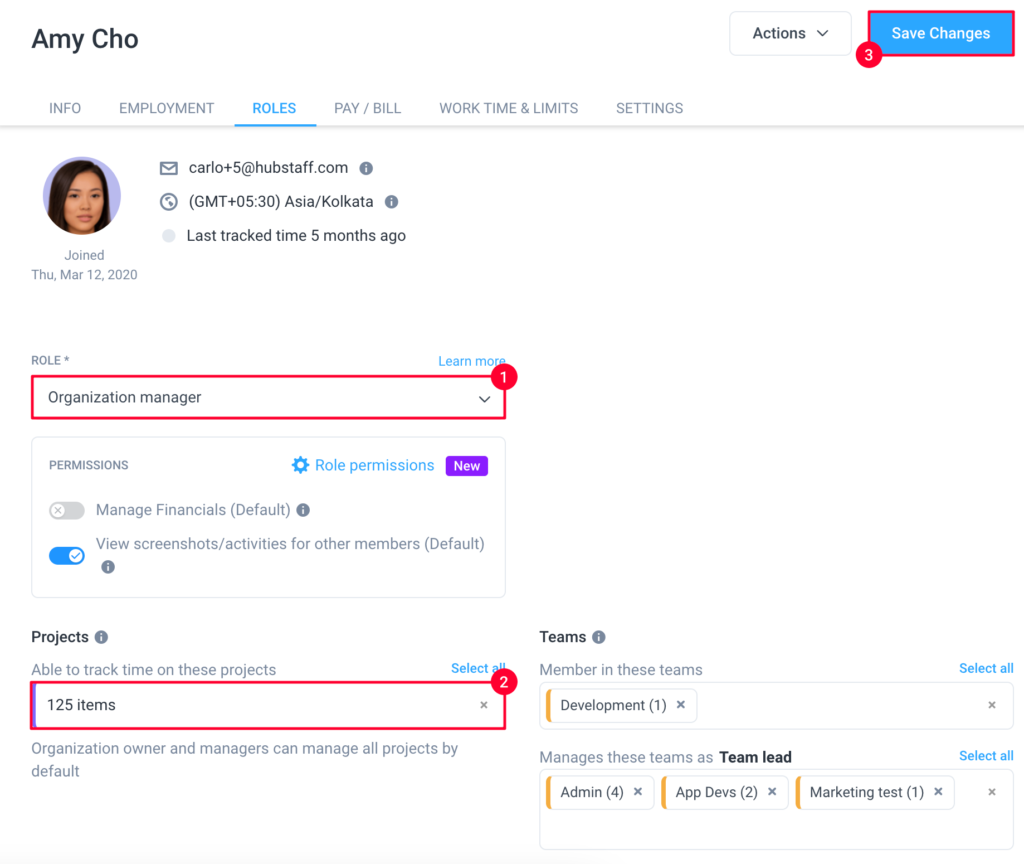
This will open a page with the member’s detailed information. Under the Roles tab, you may make changes to the membership and roles of a member. You may access this profile page if you click on a member’s name instead of the pen icon.
Click Save Changes to apply them.


