4 minutes
Accepting Wise transfers as a member
There are two approaches to how to accept incoming transfers.
The first approach: via Wise’s bank details to Wise balance
We advocate for using this approach.
These are the steps that this method implies:
- Get the bank details from Wise.
- Accept the money using the bank details provided by Wise and eventually get it on your Wise balance.
- Convert it to the local currency (from one Wise balance to another) if needed.
- Send funds to your local bank (if needed) or just spend the money using a Wise card (if you have one).
Example:
Your organization has USD set as its currency. The owner sends a transfer in USD, and you get the email to accept it. The procedure is straightforward: please, fill the form with the bank details you get from Wise. After that, the money will land on your Wise USD balance. If needed, you may convert it to the currency of your choice, e.g., PHP, and send a transfer to your local bank where you have your account in PHP.
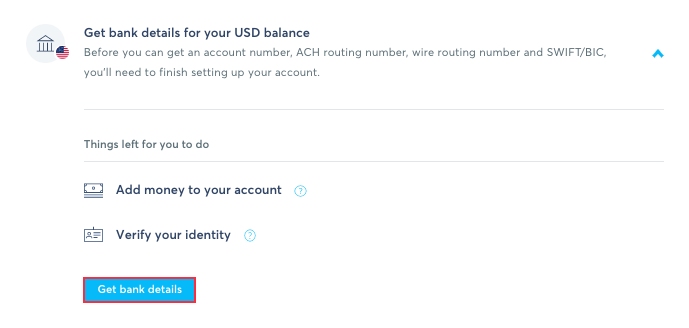
Please click here to learn more about how to prepare your Wise account for payroll. Each member needs to create a Wise borderless balance with an associated bank detail as shown below to receive funds in the same currency. To get bank details for your borderless account balance, click on the currency on your Wise sidebar then click on the Get bank details button.
The second approach: accepting a transfer to your local bank directly
Step 1
Click on your avatar located in the bottom left corner of your dashboard, then select Payment Accounts from the pop-up menu. There, if you don’t have a Wise account yet, please, add it as shown in this article.
If you have it, click Edit, and make sure that you have your local bank’s currency selected under Wise Currency.
Step 2
Once done, you will need to accept the incoming transfers directly to your local bank. If you mark your account as primary and add the local bank details to it, you won’t need to fill out the acceptance form every time.
