7 minutes
Adding and assigning projects in Hubstaff
Use projects to organize the work your team tracks time against. You can assign to-dos or tasks to specific members within each project. You can also link clients to projects so you can bill the time logged to a specific project for that client.
For example, your company might be tracking time for the marketing department. In this scenario, the project would be Marketing, and the To-dos associated could be Facebook ads, Scheduling Instagram posts, etc.
If you are a web-focused agency, you may have several clients with website properties to track time for. In this scenario, you could break down your projects like this. www.site1.com, www.site2.com, www.site3.com. The To-dos would then be more focused on completing specific tasks associated with that website, e.g. Redesigning the front page, fixing CSS in section A, etc.
How to create a project
Step 1
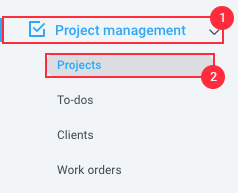
On the sidebar, locate Project Management > Projects section, then click on Add Project.
Step 2
Next, name your project, specify whether it’s billable on invoices, choose whether to record activity for it, and add a client if needed (available on Team and Enterprise plans). Optional: link the Hubstaff (Time Tracking) project to your Hubstaff Tasks organization.
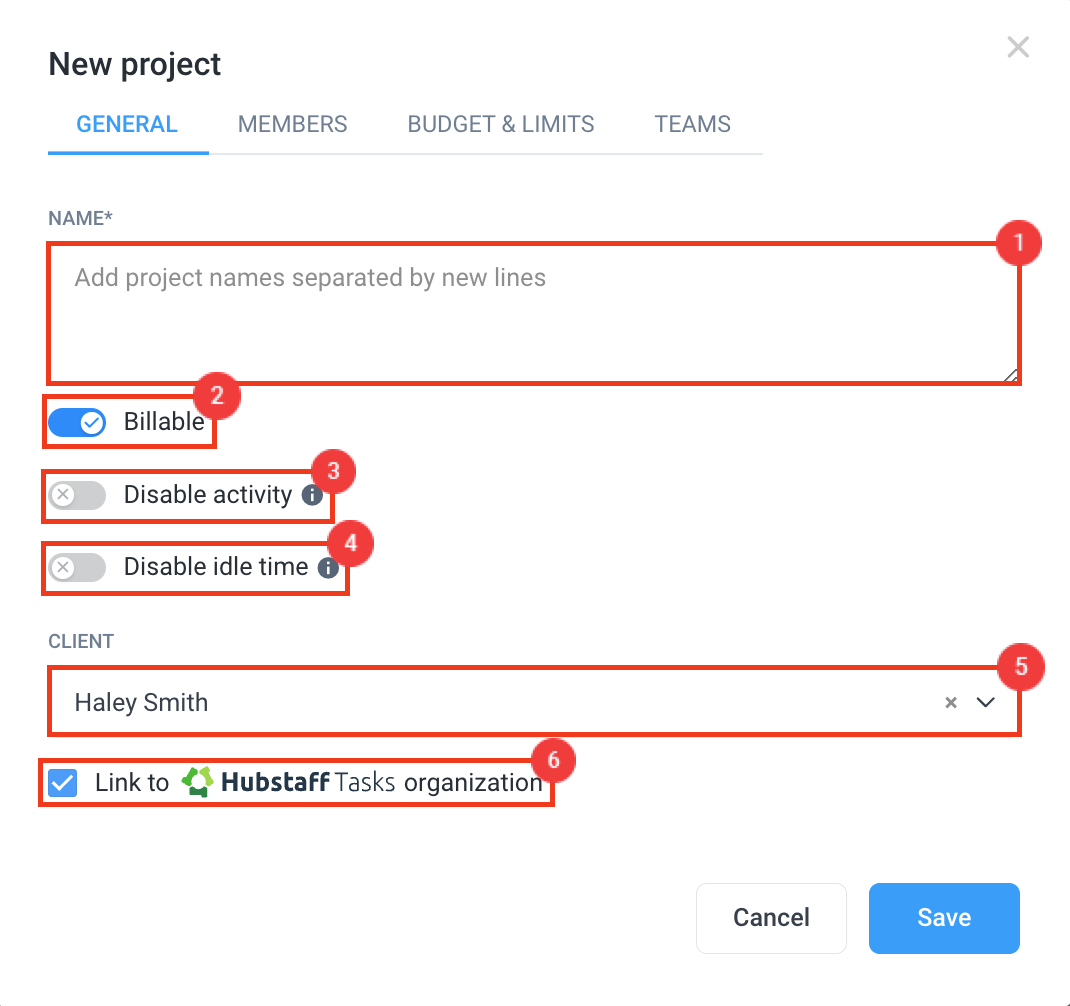
You can add multiple projects at once by adding project names in separate lines.
You may hit the Save button now and configure the project budget, members, and teams at a later date or proceed to the next step.
Step 3
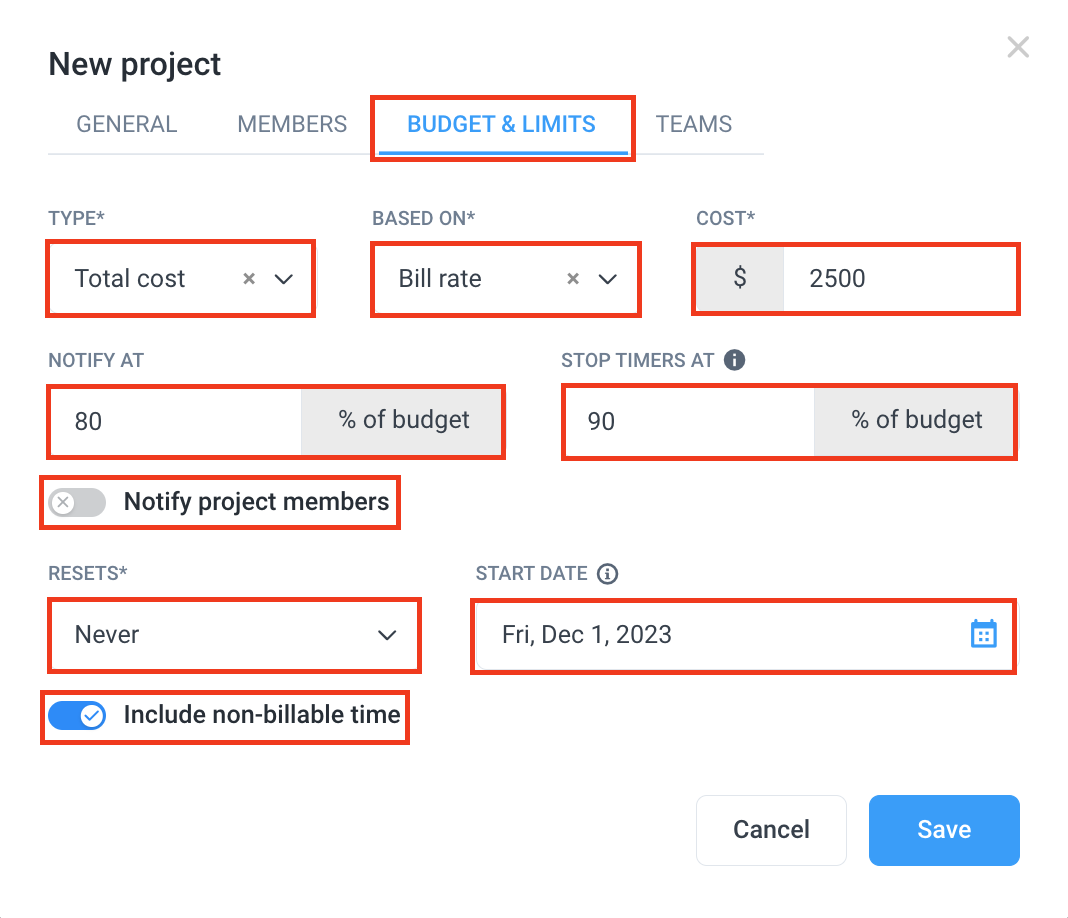
Select the Budget tab.
- Type – can be based on:
- Total cost
- Total hours
- Based on – where the budget is based on:
- Pay rate – the rate you pay your team member/s.
- Bill rate – the rate you bill for the time tracked by your team.
- Cost – can be in amounts or hours depending on the Type.
- Notify at – a specific percentage of the budget where you’ll be notified by email.
- Resets – can be set to Monthly, or Never.
- Include non-billable time – control whether the non-billable time is included in the budget.
- Start date – this will take into account time tracked from that date forward.
Step 4
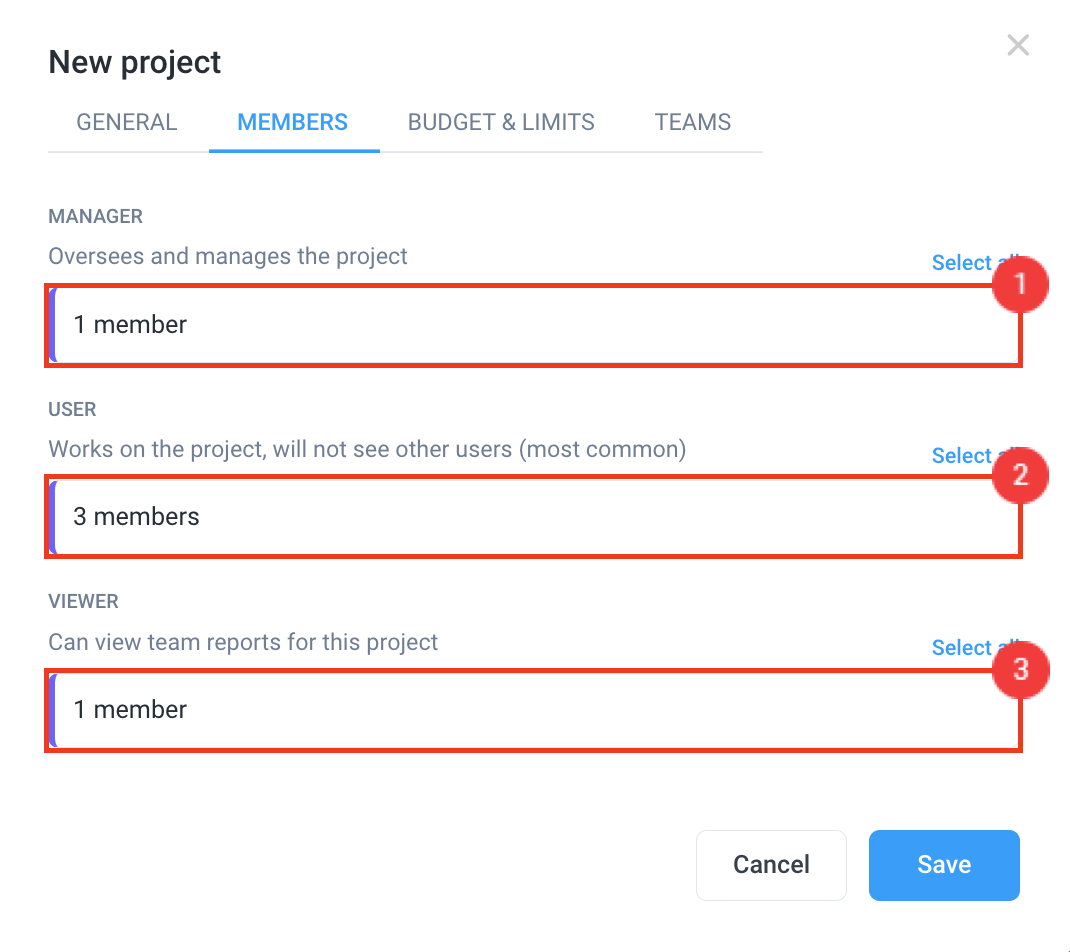
Select the Members tab.
Typically, team members are assigned as Users within a project. This will give them the ability to track time against a project. Managers will also be able to track time against a project, and will additionally have access to view all the data associated with that project. Please note, Viewers will not be able to track any time against a project. If you wish to learn more about the different role types within Hubstaff, please see our guide here.
Step 5
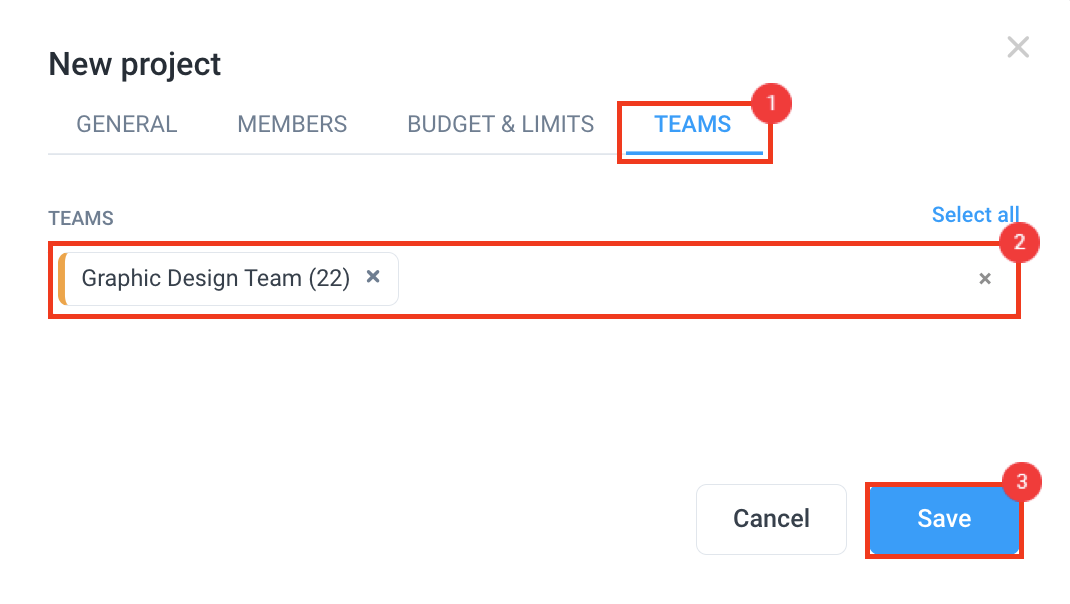
Instead of adding individual members to a project, you may opt to add Teams. Click here to learn more about how to add Teams.
Finally, once all fields are completed, click Save to finalize the project.
