6 minutes
Adding Member Information
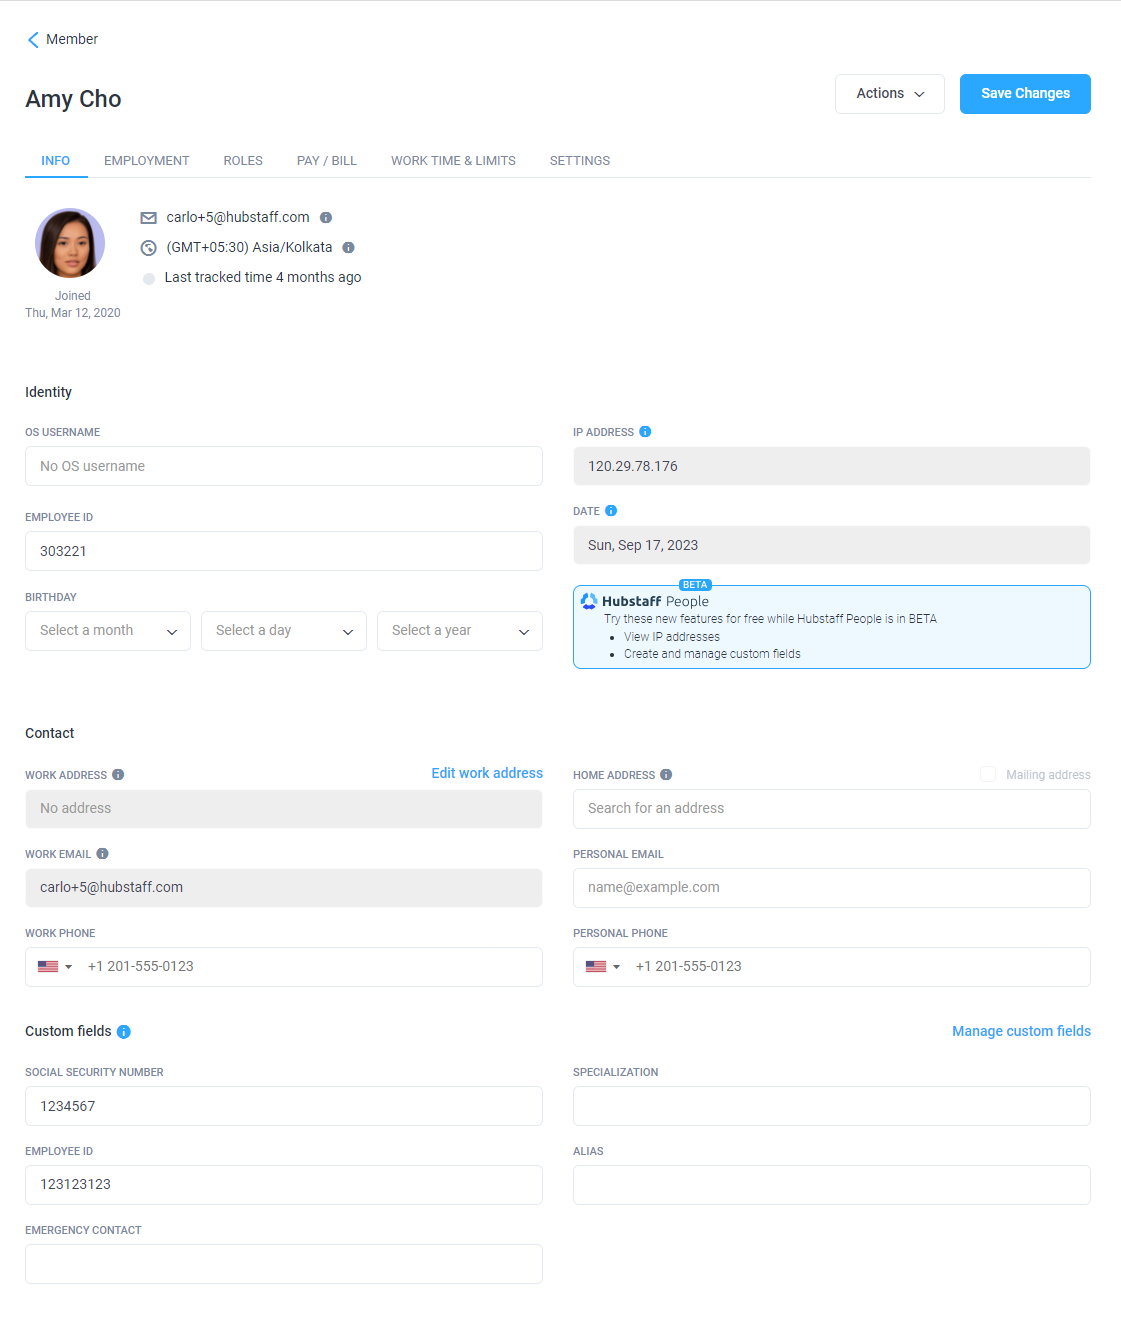
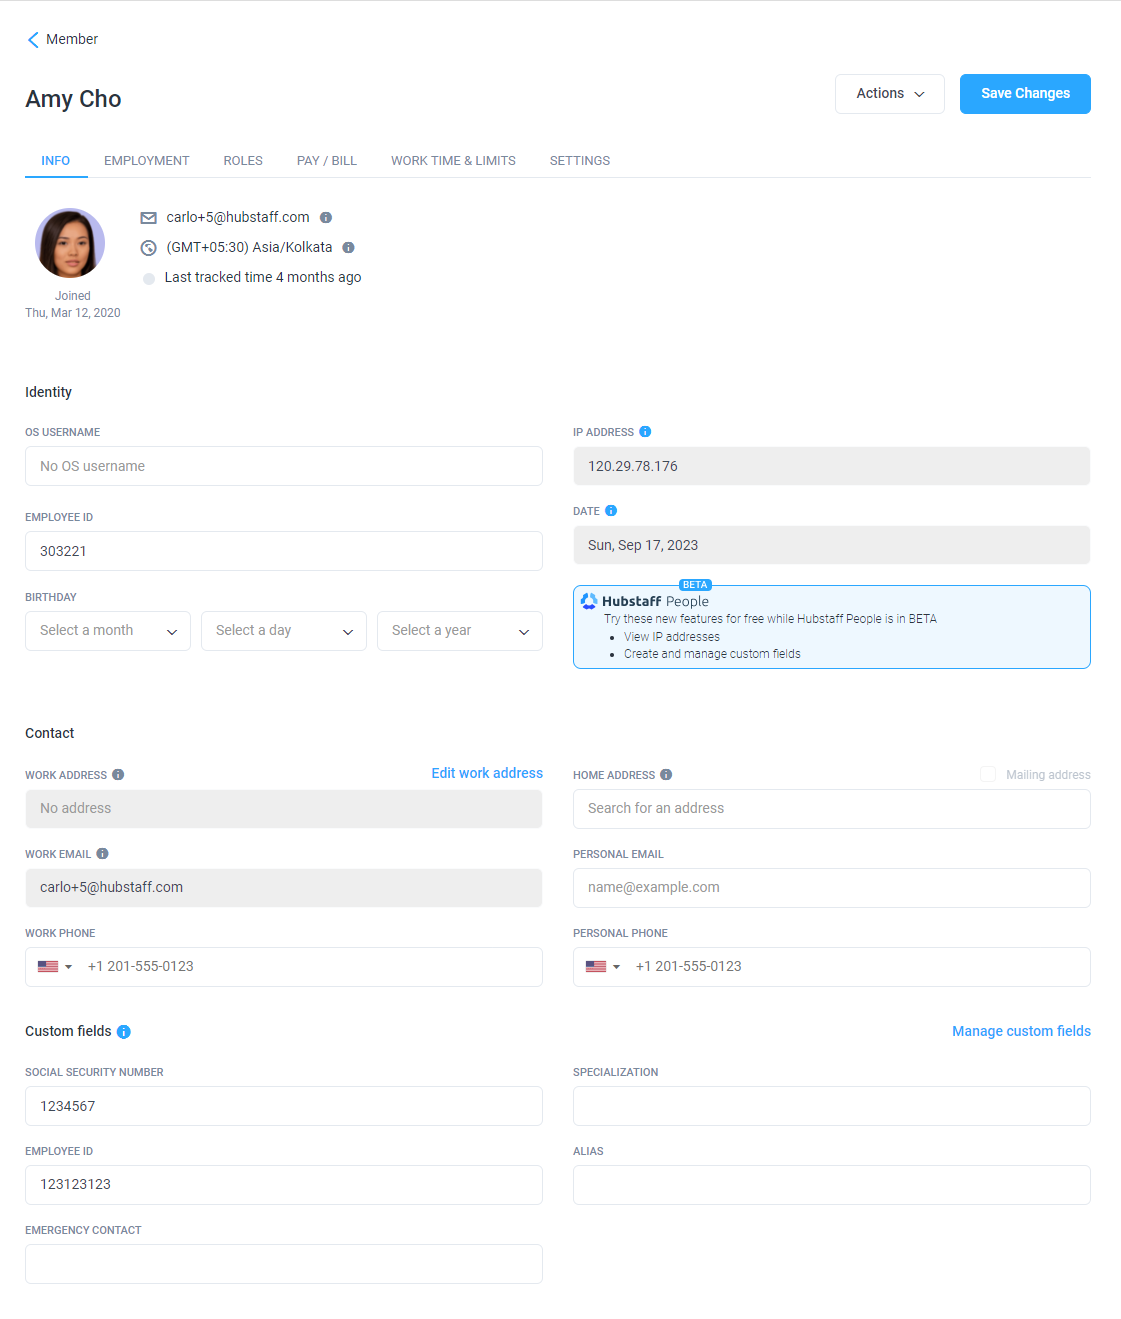
In Hubstaff, you can now add member information for accurate record-keeping. Available fields include:
- Identity
- OS username
- Employee ID
- Birthday
- IP address (available via Hubstaff people beta add-on)
- Date joined (available via Hubstaff people beta add-on)
- Contact
- Work address (available via Hubstaff people beta add-on)
- Work email (available via Hubstaff people beta add-on)
- Work Phone
- Home address (available via Hubstaff people beta add-on)
- Personal email
- Personal phone
- Custom fields
Adding member information
To add member information:
Step 1
First, navigate to People > Members on the sidebar of your dashboard.
Step 2
On the far right-hand side of the member’s name, click on Actions > Edit info.
Step 3
Fill in the fields, then hit the Save Changes button once done.
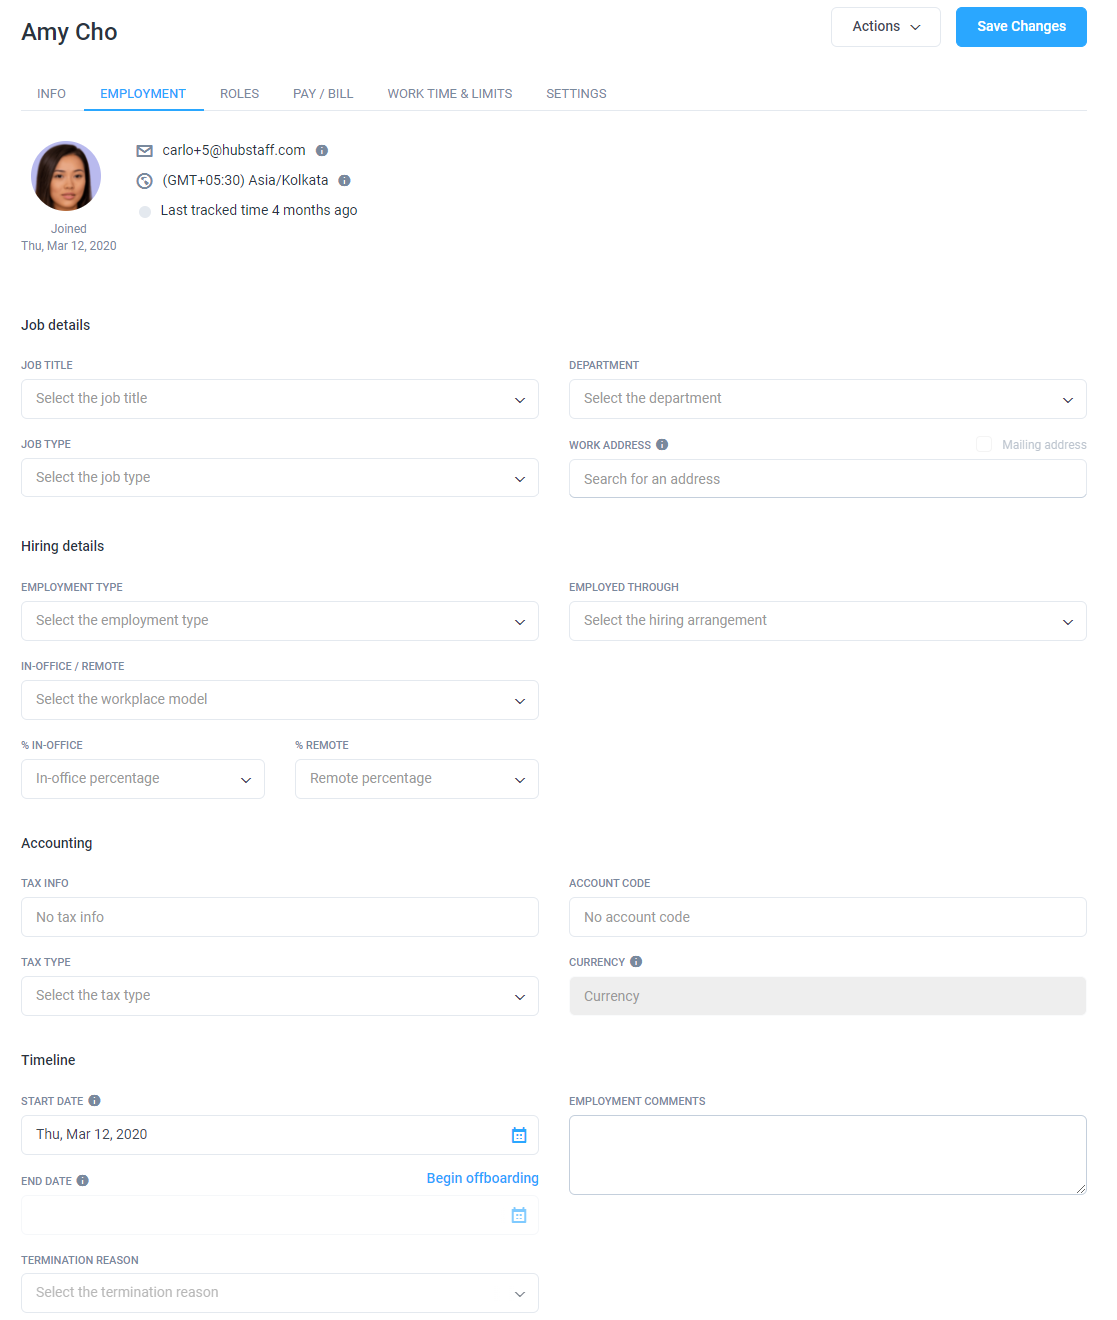
Optional: You can also fill out the Employment tab when the Hubstaff People add-on is enabled.
Here you can add:
- Job details
- Job title*
- Job type
- Department*
- Work address
- Hiring Details
- Employment type
- In-office/remote
- % in office/%remote
- Employed through
- Accounting
- Tax info
- Tax type
- Account code
- Currency
- Timeline
- Start date
- End date
- Termination reason
- Employment comments
Note: Fields with the asterisk (*) are customizable drop-down fields where employers can add personalized options.
After that, all the records you entered for the team member will be saved on our database.
Adding custom fields
To add custom fields for the member’s page, please follow the steps below:
Step 1
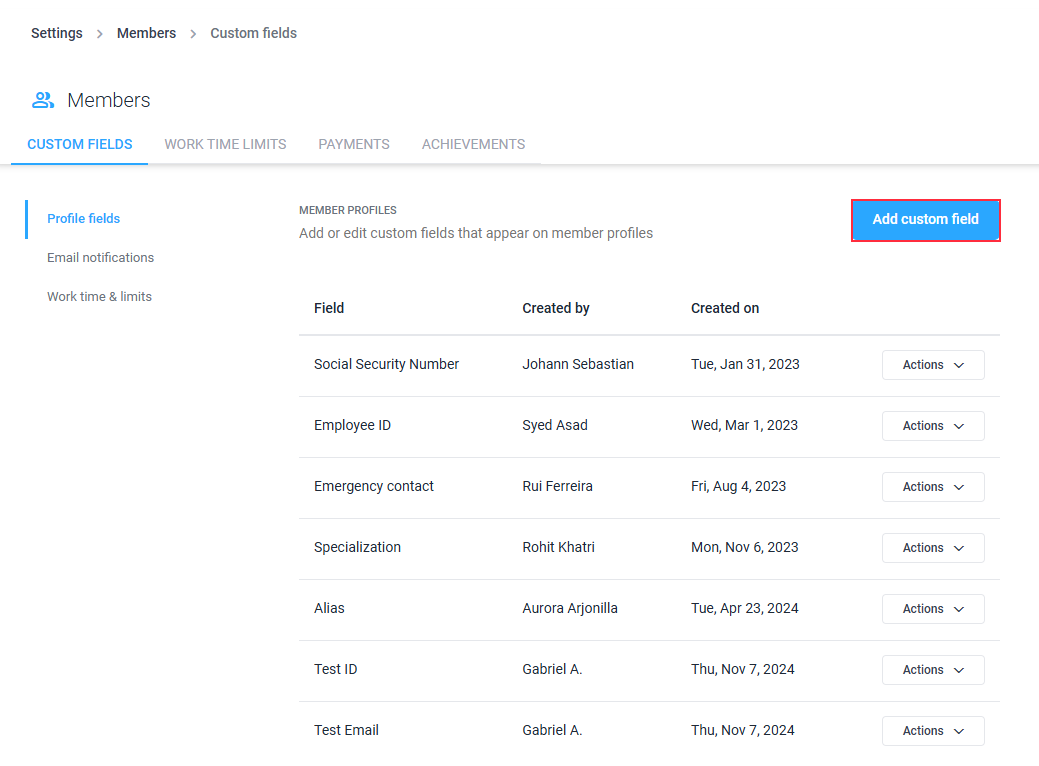
First, navigate to Settings > Members > Custom Fields on the sidebar of your dashboard.
Step 2
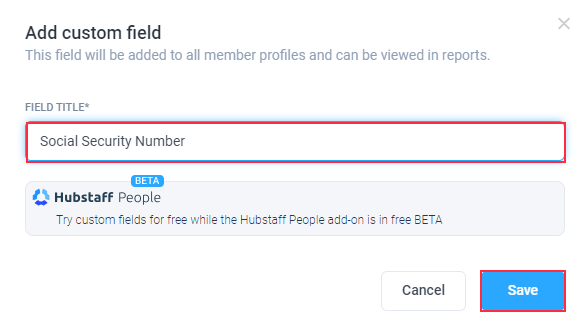
Click on the Add Custom Field button.
Once added, you’ll see the new custom field on the members page:


