6 minutes
How do I add Clients to a Project?
You can assign multiple clients to your projects with Hubstaff. This makes it easy for organization owners to manage invoices and bill clients.
Please note, before you can link projects to your clients you will need to add them to Hubstaff.
How to add clients to new projects
Step 1
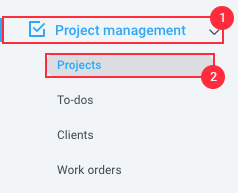
Select Project management then Projects from the main menu. Then click Add project.
Step 2
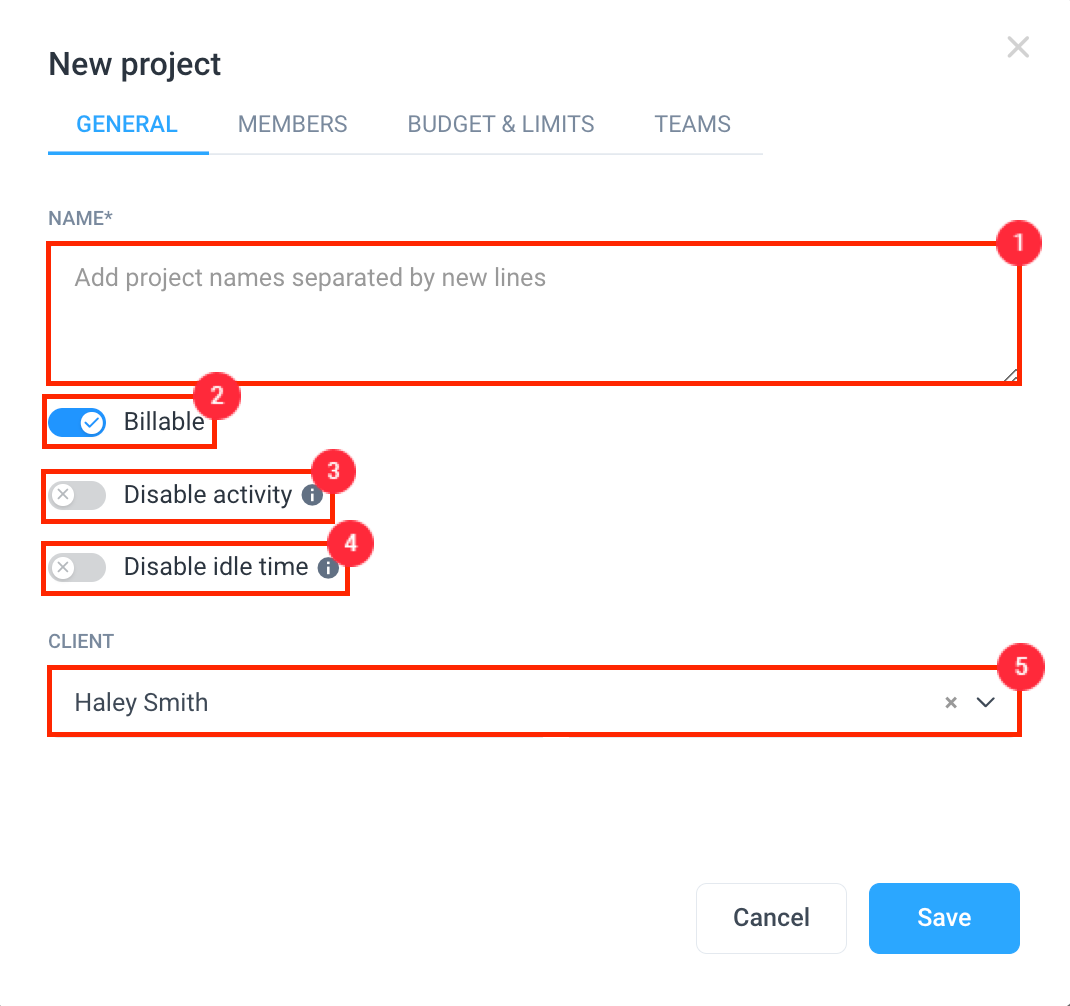
A pop-up window will appear allowing you to enter the details of your project.
Enter the project’s name, specify if this project is billable on invoices, choose if the activity is recorded for the project, and then add a client (available on Team and Enterprise plans).
You may hit the Save button now and configure the project budget, members, and teams at a later date or proceed to the next step.
Only one client can be assigned to each project.
How to add clients to existing projects
Step 1
If you have already created your project, and want to assign or change the client, please follow the steps below.
Select Project management then Projects from the main menu.
Click Actions and Edit project.
Step 2
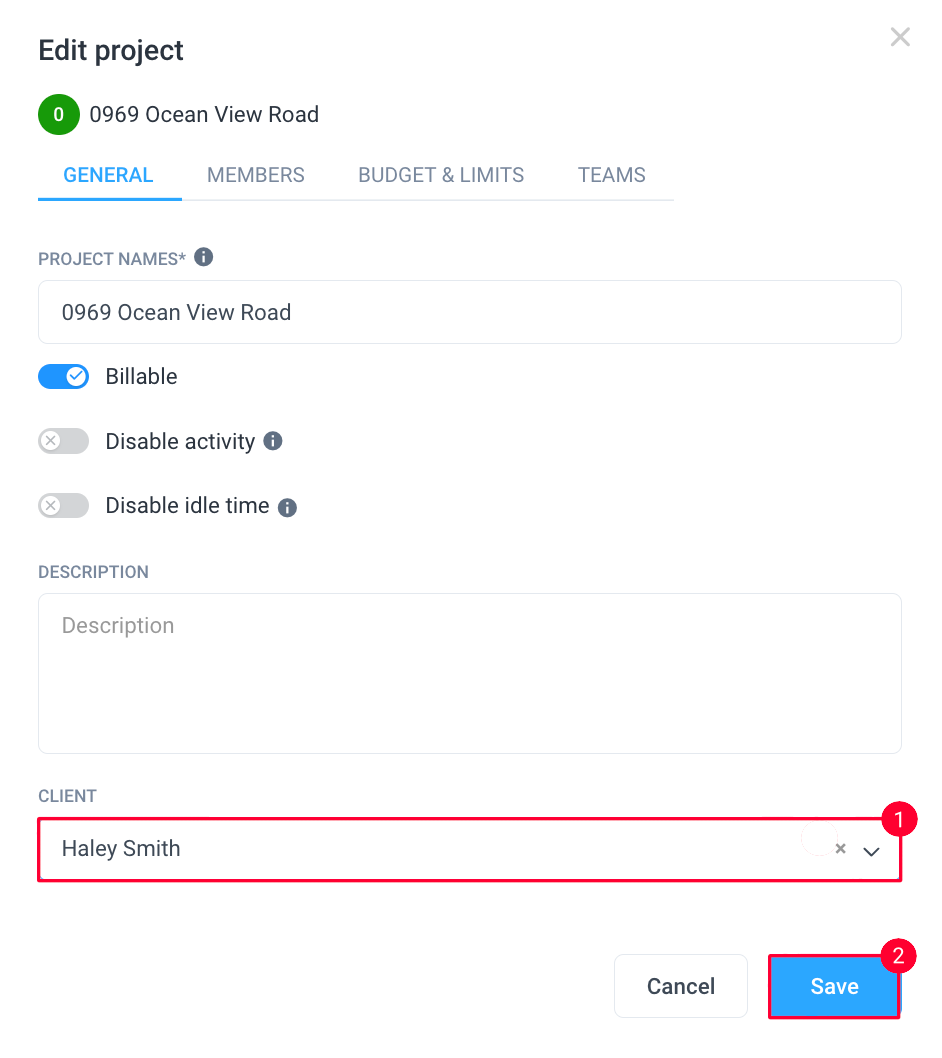
A pop-up window will appear allowing you to select or change the client. Select the correct client under the Client field.
Hit Save to finalize the changes.
How to remove clients from projects
Step 1
Select Project management then Projects from the main menu.
Click Actions and Edit project.
Step 2
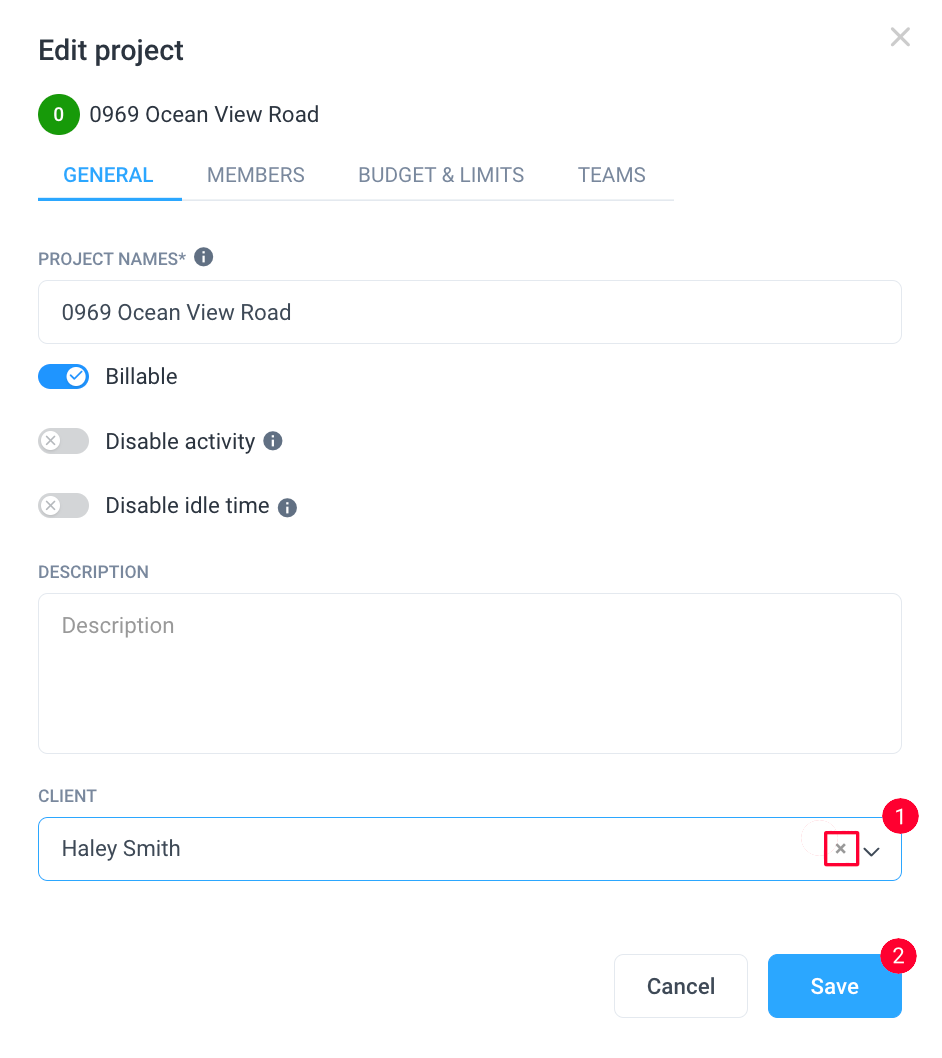
Click the X button located in the Client field. Then select Save to confirm the changes.


